
The problem
When it comes to page transitions, we as web developers have been struggling. Although in the days of Macromedia Flash there was a lot happening (maybe a bit too much), these days it’s very rare to find a website using proper page transitions. Without using a Single Page App, it’s pretty hard to do. And surely we’ve seen a lot of Webflow and over-animated pages, but you don’t come by those pages (let alone page transitions) with subtle “that makes sense”-animations that easily.
I recently talked about my previous blog post in a podcast and discussed this topic too. We briefly talked about new things that are happening and I noticed a tweet that Addy Osmani (who works on Google Chrome) made about the Shared Element Transitions API:
When this proposal comes through, it will enable developers to more easily create animations for page transitions as we see on iOS for example.
The solution
At this time we can’t use the Shared Element Transitions API just yet. And you’re here because you want to know how to achieve nice subtle animations between pages in Phoenix Liveview right now… So let’s get started.
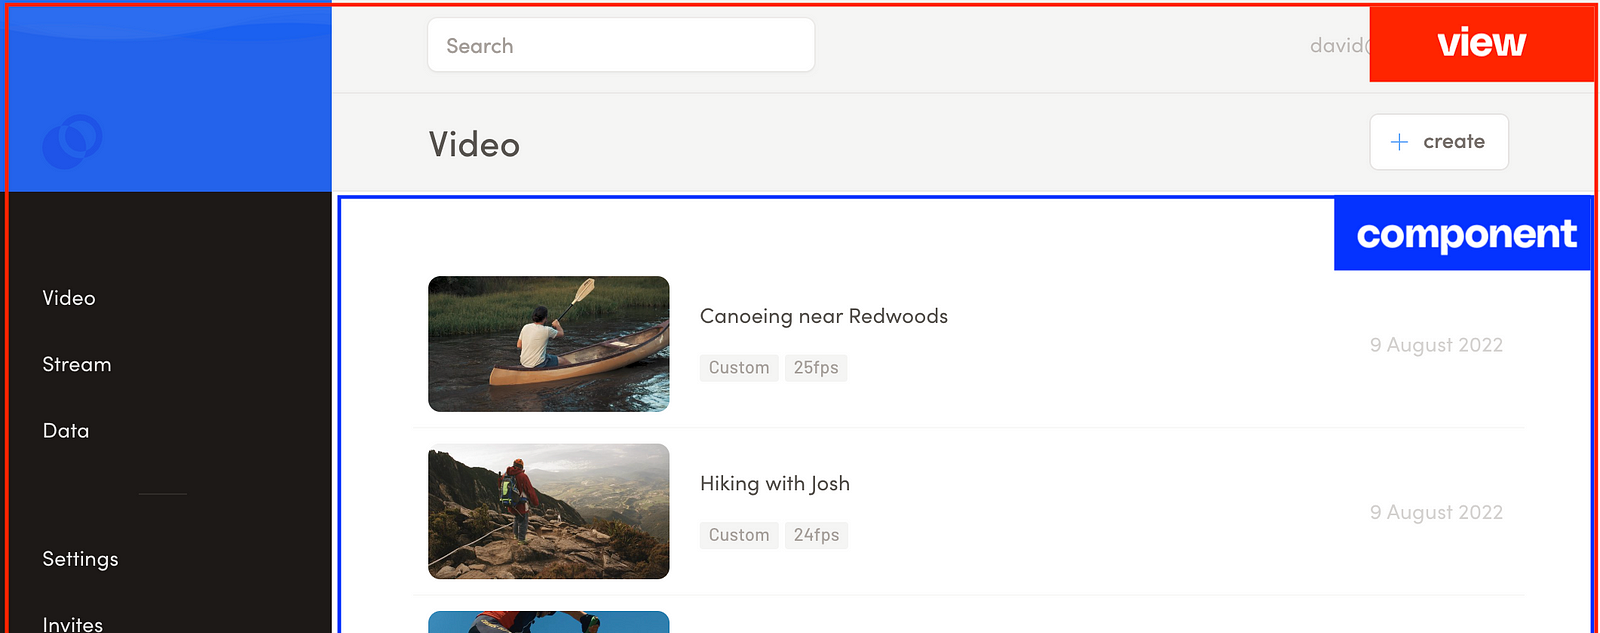
Before we do though, we need to understand the difference between routing between pages and components. When using LiveView the DOM is patched based on what you’ve changed. So whenever you switch to another page using either Phoenix.Liveview.push_patch or Phoenix.Liveview.push_redirect, it will only replace the view or component you intend to change. The difference between the two is that with a push_redirect (or live_redirect) it will reload the view, while push_patch (or live_patch) will update the current view and update whatever difference it can find within by dom diffing (comparing the new HTML output with the old, and just only updating the parts that are different).
It really depends on how your project is structured to get page transitions to work. But at mave, we like to keep the use of layouts to a minimum, and have our project set to use patch_to solely for the animations. This is because we only want to animate the inner container (similar to how native applications animate) and leave the rest of the page as is. Our application consists of one view with every “page” as a component. This way we can patch to every component, which is just a content replacement, and still update data in the view if we would need to.
On the content component we apply the following tailwind classes: transition duration-100 ease-out opacity-0 scale-95. These are the default classes, which are there when the component is rendered. Meaning: the div will not be visible initially. Now we want to trigger the animation when the component is loaded using the mount hook in Javascript:
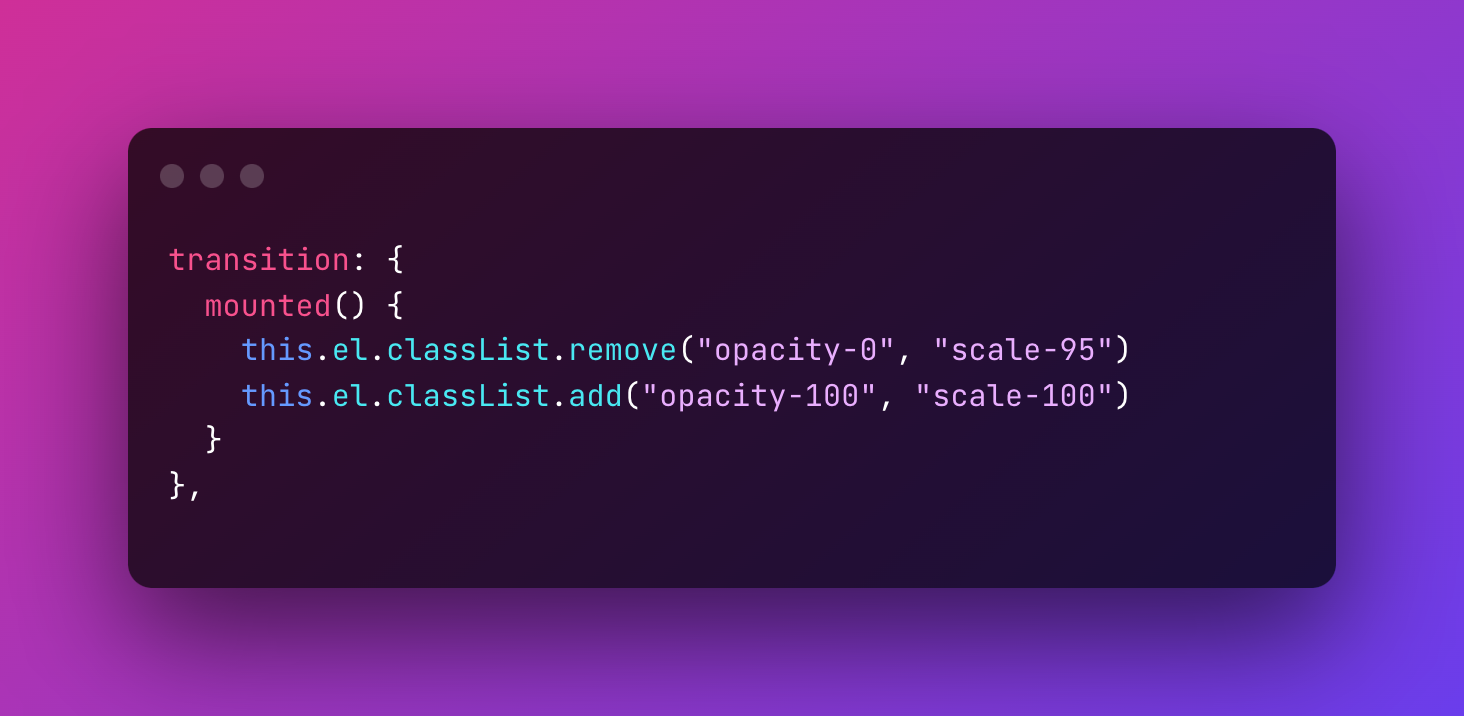
Now adding phx-hook="transition" to the div of the content component that needs to be animated. Phoenix requires an id attribute when applying a phx-hook, so don’t forget to add one. Unfortunately, most browsers aren’t really happy with applying animations directly after an HTML change (which is what Phoenix does to apply the dom diff), so the above won’t work. We need to wait a few milliseconds to run the animation:
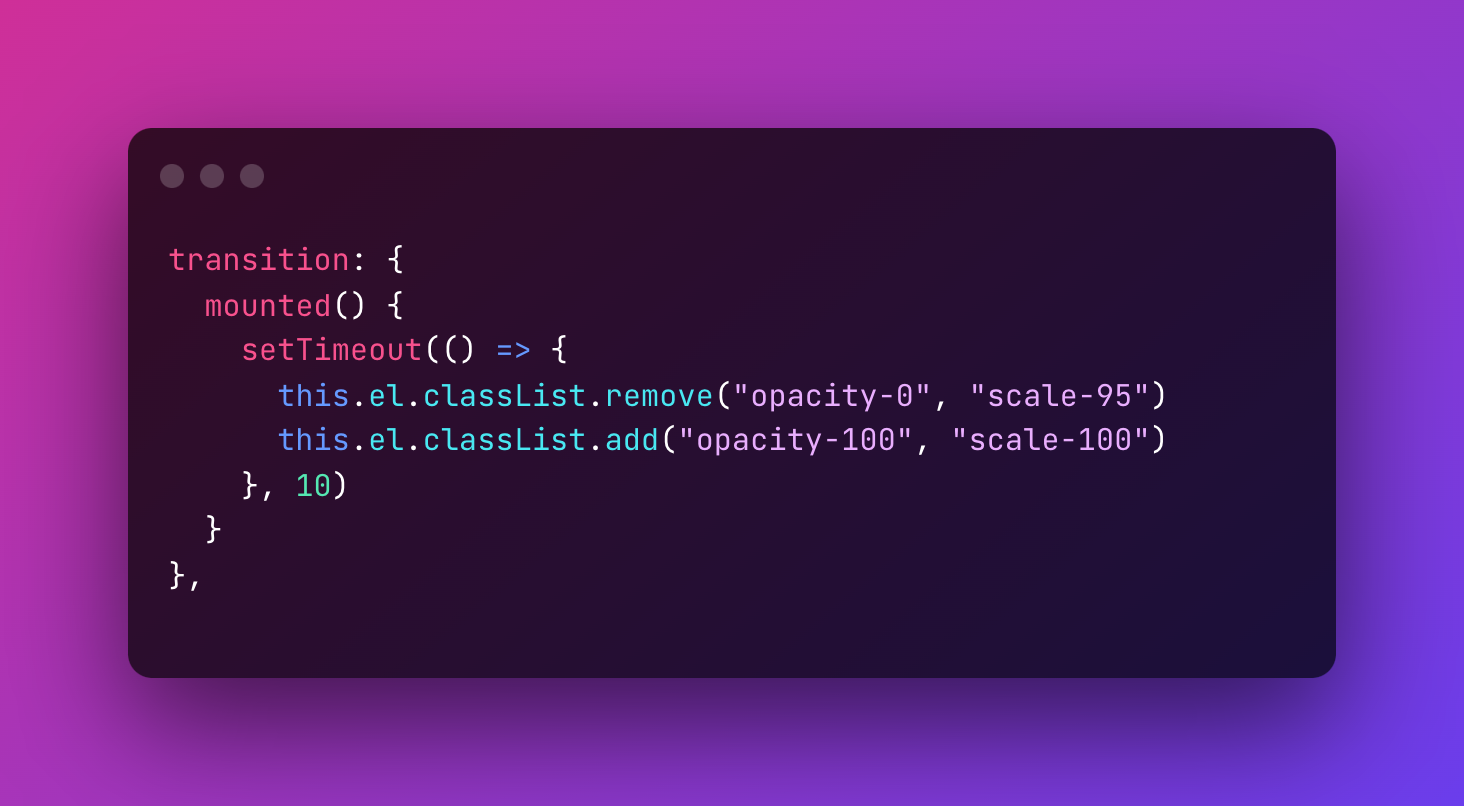
Now every time the component mounts it will run this transition animation.
But what if you want to make a more custom animation for a specific view? Maybe one view sliding from the left, and the other sliding from the right. To achieve this you want to just change classes in your HEEX template, and not in Javascript. So let’s make it more generic:
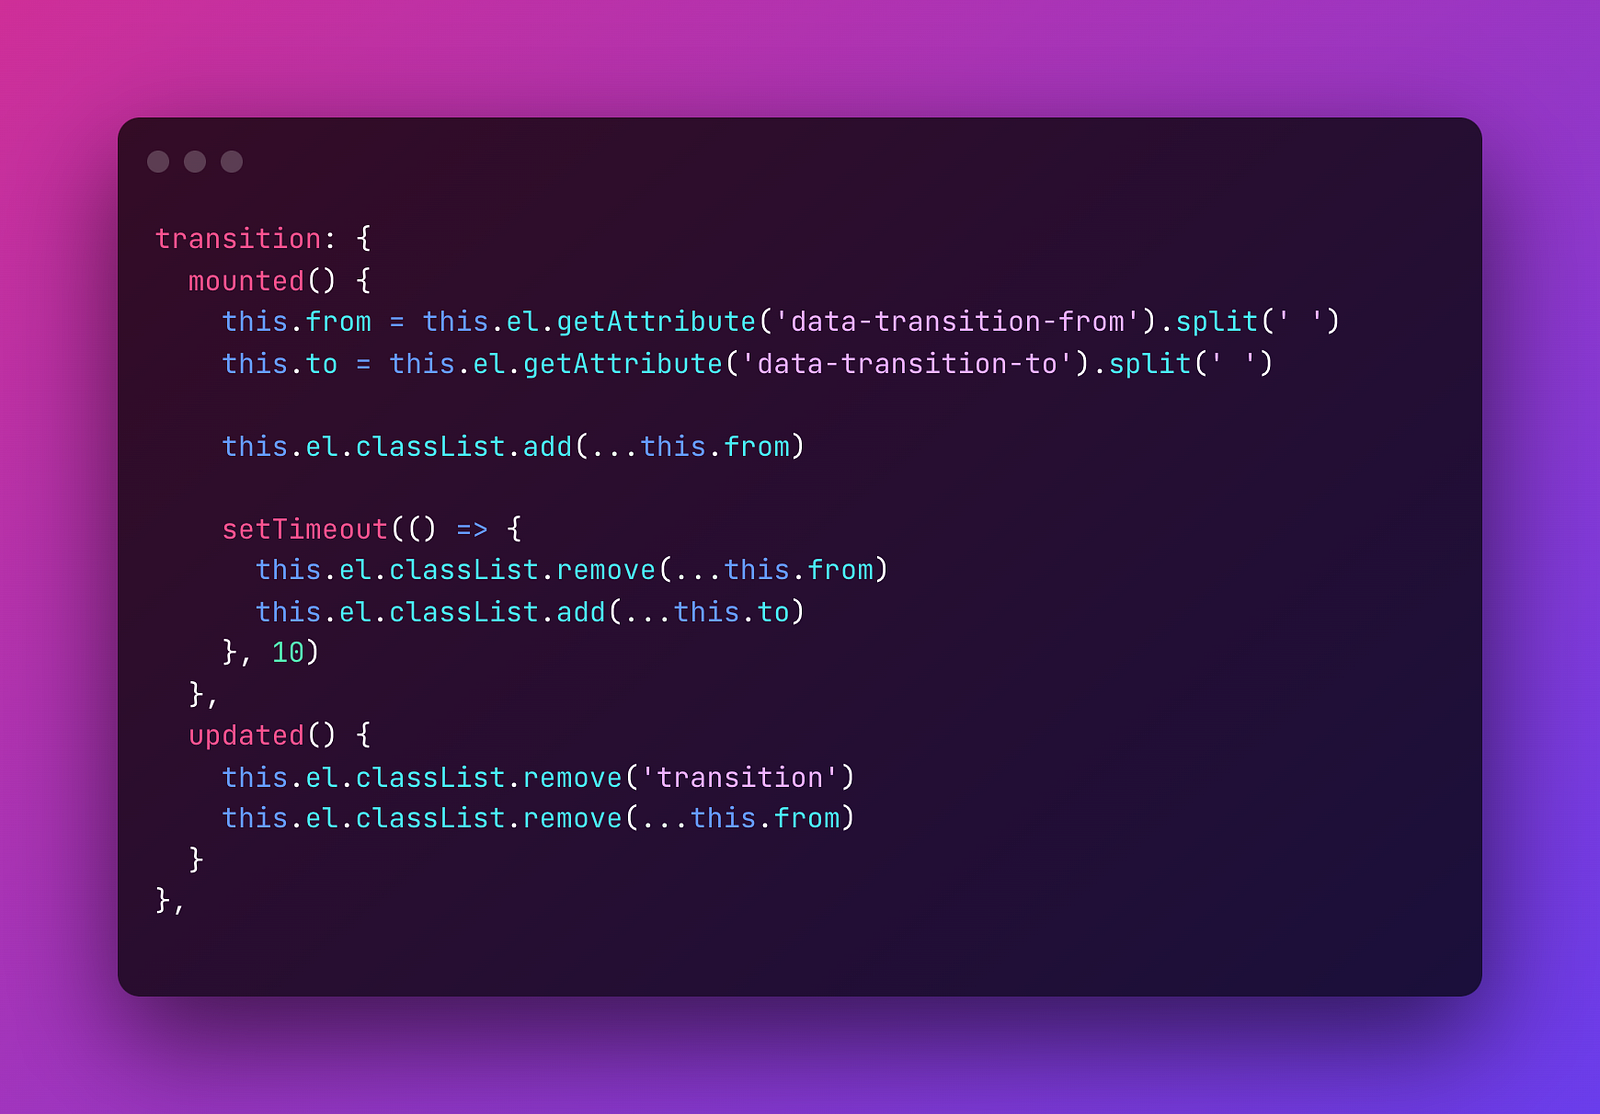
This will get the classes from a list as attributes to the div you’re applying it to. Besides that we also added the updated hook, to make sure whenever you update anything in your component it doesn’t go back to the default state: which will make it invisible opacity-0.
And instead of calling the hook directly, we create a convenience method that makes it a bit easier to write out these transitions:
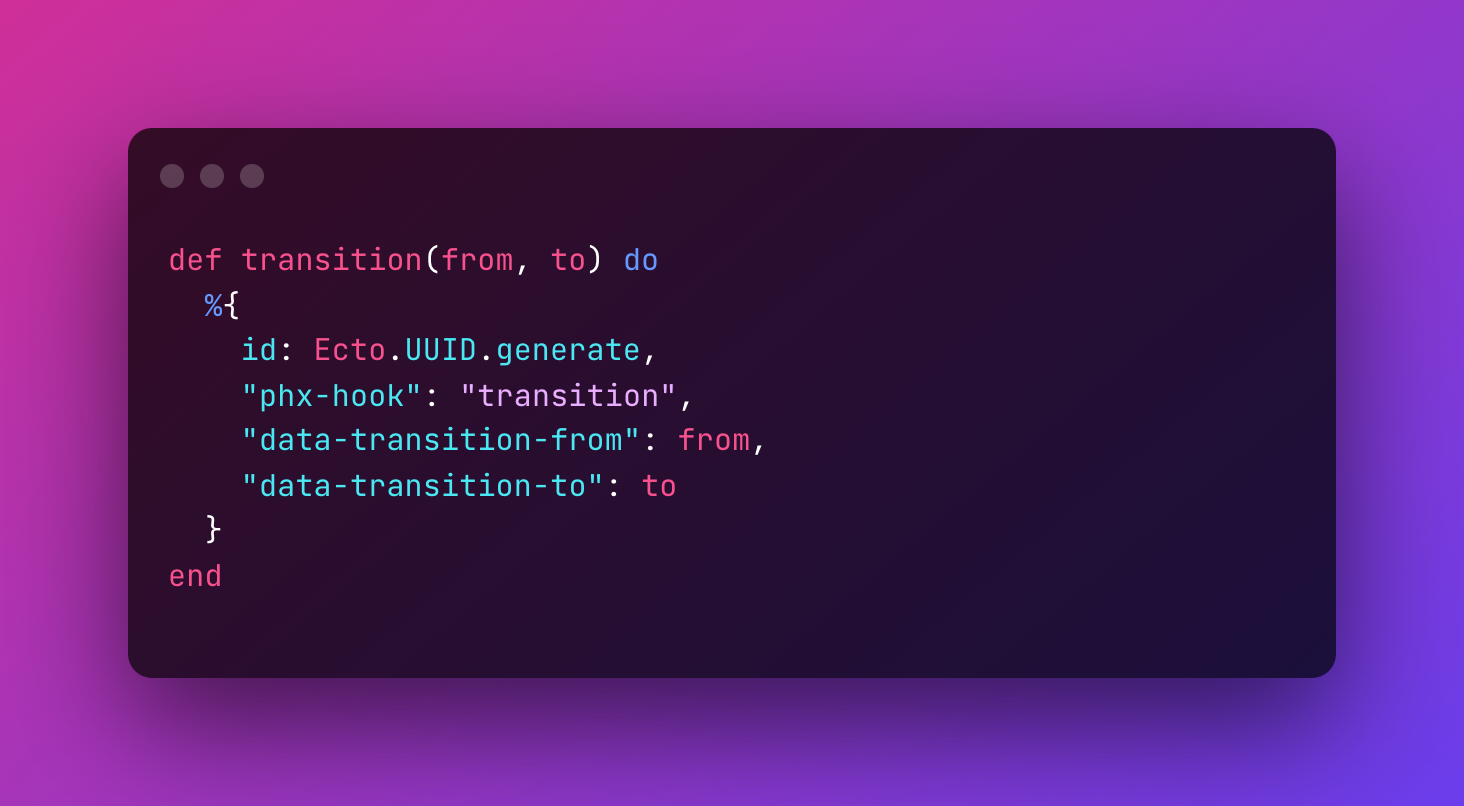
Now without making any changes to your Javascript you can write your div and apply the changes you want: <div class="transition duration-100 ease-out opacity-0 scale-95" {transition("opacity-0 scale-95", "opacity-100 scale-100")}> ... </div> No need to add an id attribute or the hook. Just apply the function to your div and it’ll add all the above attributes.
And that’s it. I hope the way we transition “pages” within Phoenix application will become part of the framework using the Shared Element Transitions API, which will be yet again one plus compared to other stacks:
If you would like to use the code above I’ve made the snippets available as a Github gist.
