
The problem
The reason why is that we think (something looking like) a form is not always suitable to use in your interface. Certain cases just require it to look like the regular interface you already have. It’s somewhat of a hidden UI though and you might feel differently about this, but we’ve implemented it like you see in the video at the top and like it.
The reason for us to implement it like so is that title is there on every page to show you where are in our admin panel of mave. It’s part of navigating through and understanding where you are. But the video page where you’ve uploaded something will default to the filename as the title. And we’ve received lots of requests to be able to change this title. So if you want to change it, you can by clicking on it and it’ll transform to a (what looks like an) input: the contenteditable element.
Unfortunately, Phoenix Liveview doesn’t ship with any component out of the box to manage contenteditable elements in a <.form /> at this point. Like you would have with text_input/3 for instance, which normally renders an input element and its associated data.
The solution
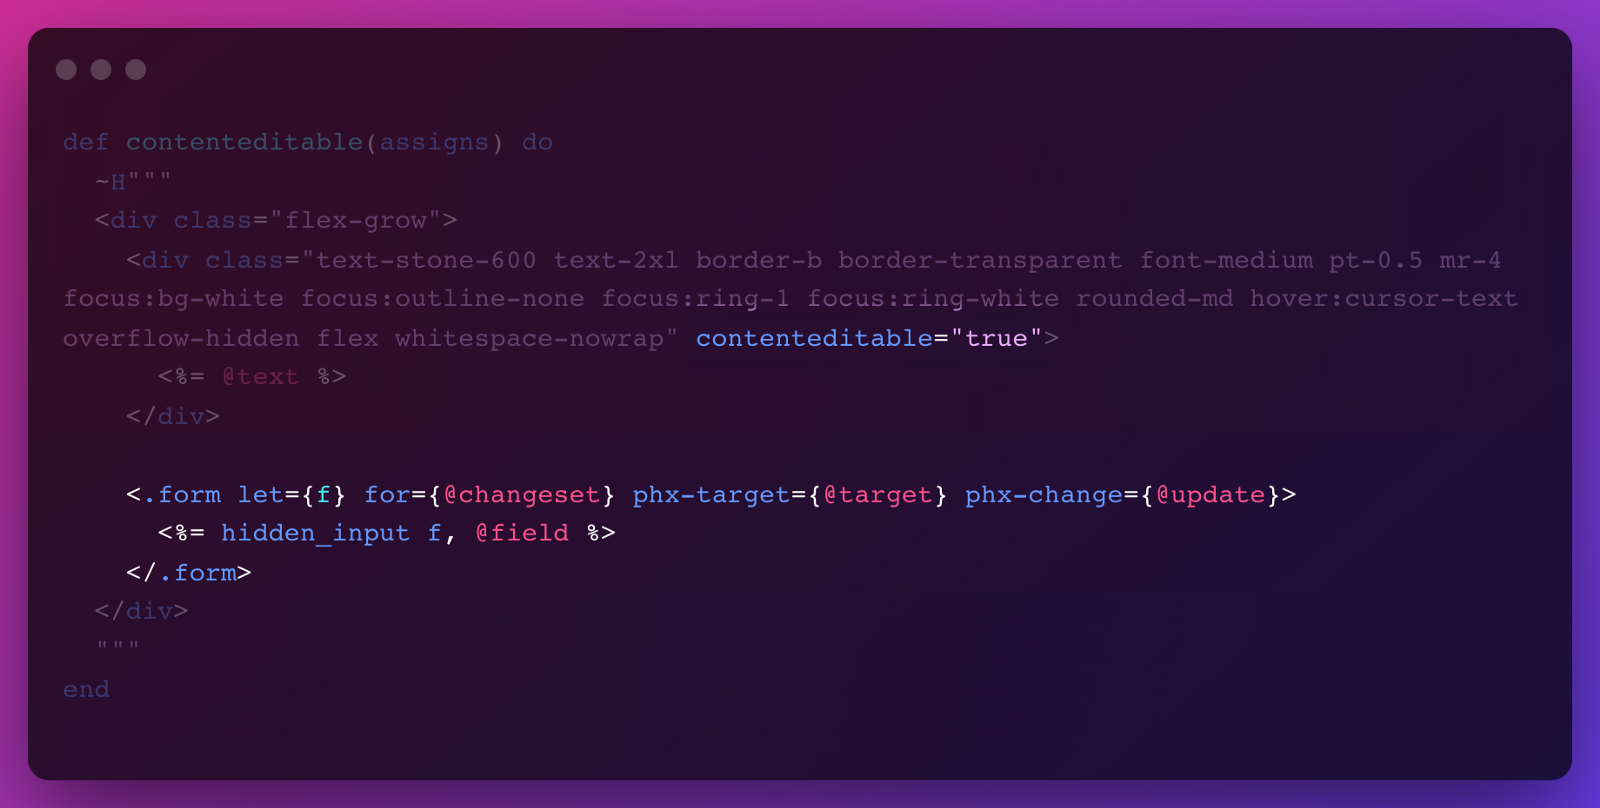
Let’s dive into how you can achieve something similar to this. Let’s start with our component, which is just some HTML. Next up you want to add some CSS classes (we use Tailwind) to make it look nice when you start editting, similar what you would expect as it would be a regular input element:

Now we need to make it play nicely with Phoenix. There are multiple approaches to get this done. You can for example use a JavaScript MutationObserver that inspects changes to the contenteditable element and hook it up with a phx-hook. However, if in the future you want to also include any error handling like we previously did using the defaults that come with Phoenix’ <.form /> component, you will need to work around that. That’s why we chose to use the form component with its hidden_input/3. This way you can use your Ecto.Changeset and validate the input like normal. We also add the contenteditable attribute:
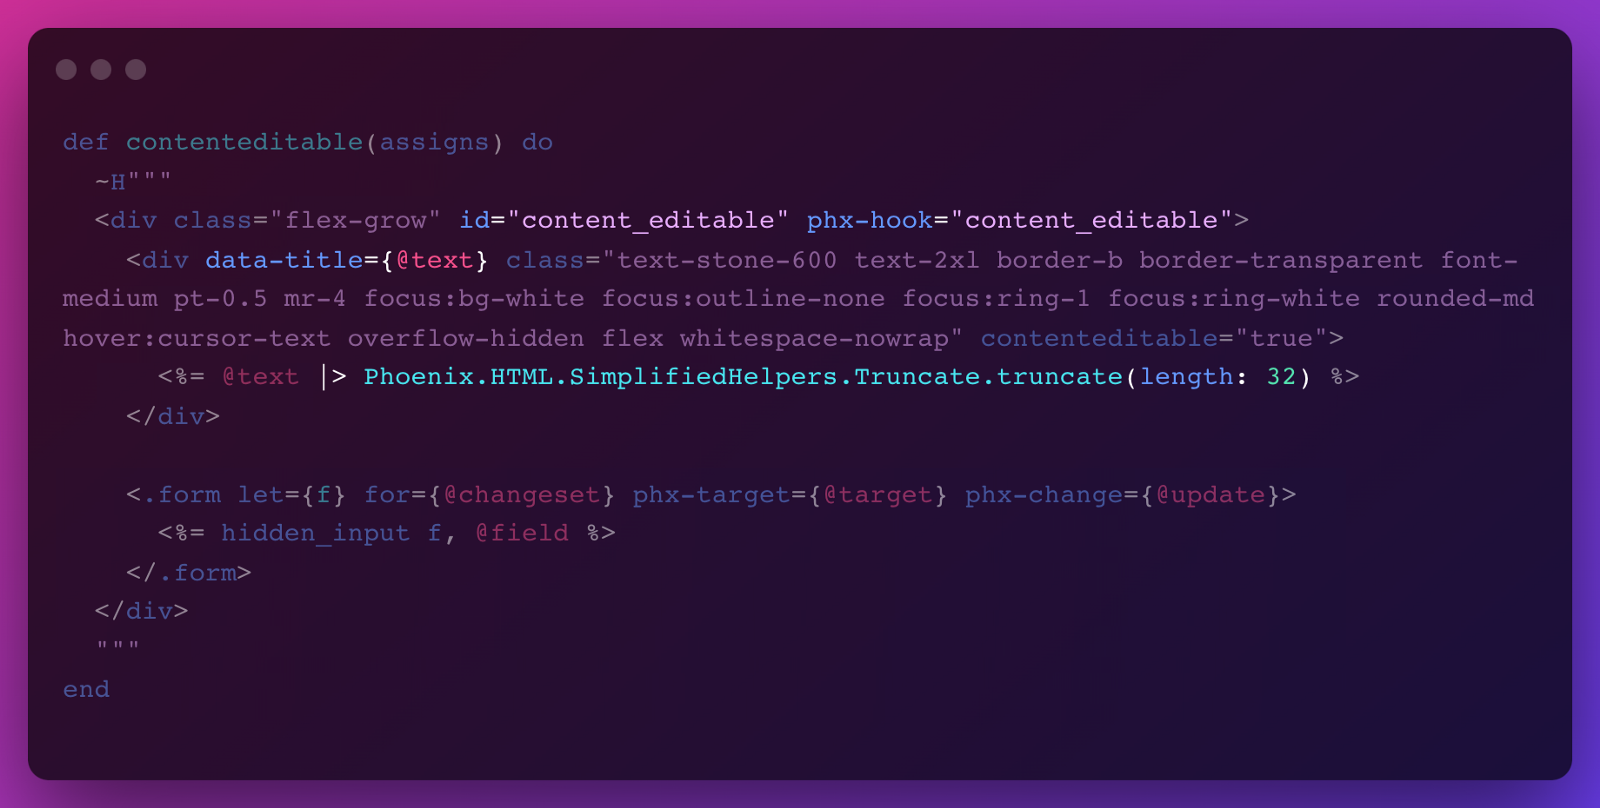
There are a couple of assigns we’ve added to the component so we can reuse this component. Now we want to reflect changes made into the contenteditable to be put into the hidden_input and vice-versa. Again we can use the MutationObserver, but we can also simply track individual events (keyup etc). Before we setup our hook, we need to add an id and phx-hook="content_editable". We’ll also do a neat little trick where we truncate our title when it becomes to long. Within our HTML we’ll use Phoenix to truncate the string. But, we still want to store and edit a long title (and not store it with ... at the end). So we’ll need to add a data attribute we’ll use in our hook:
So let’s create our content_editable hook (don’t worry if you don’t get it yet):
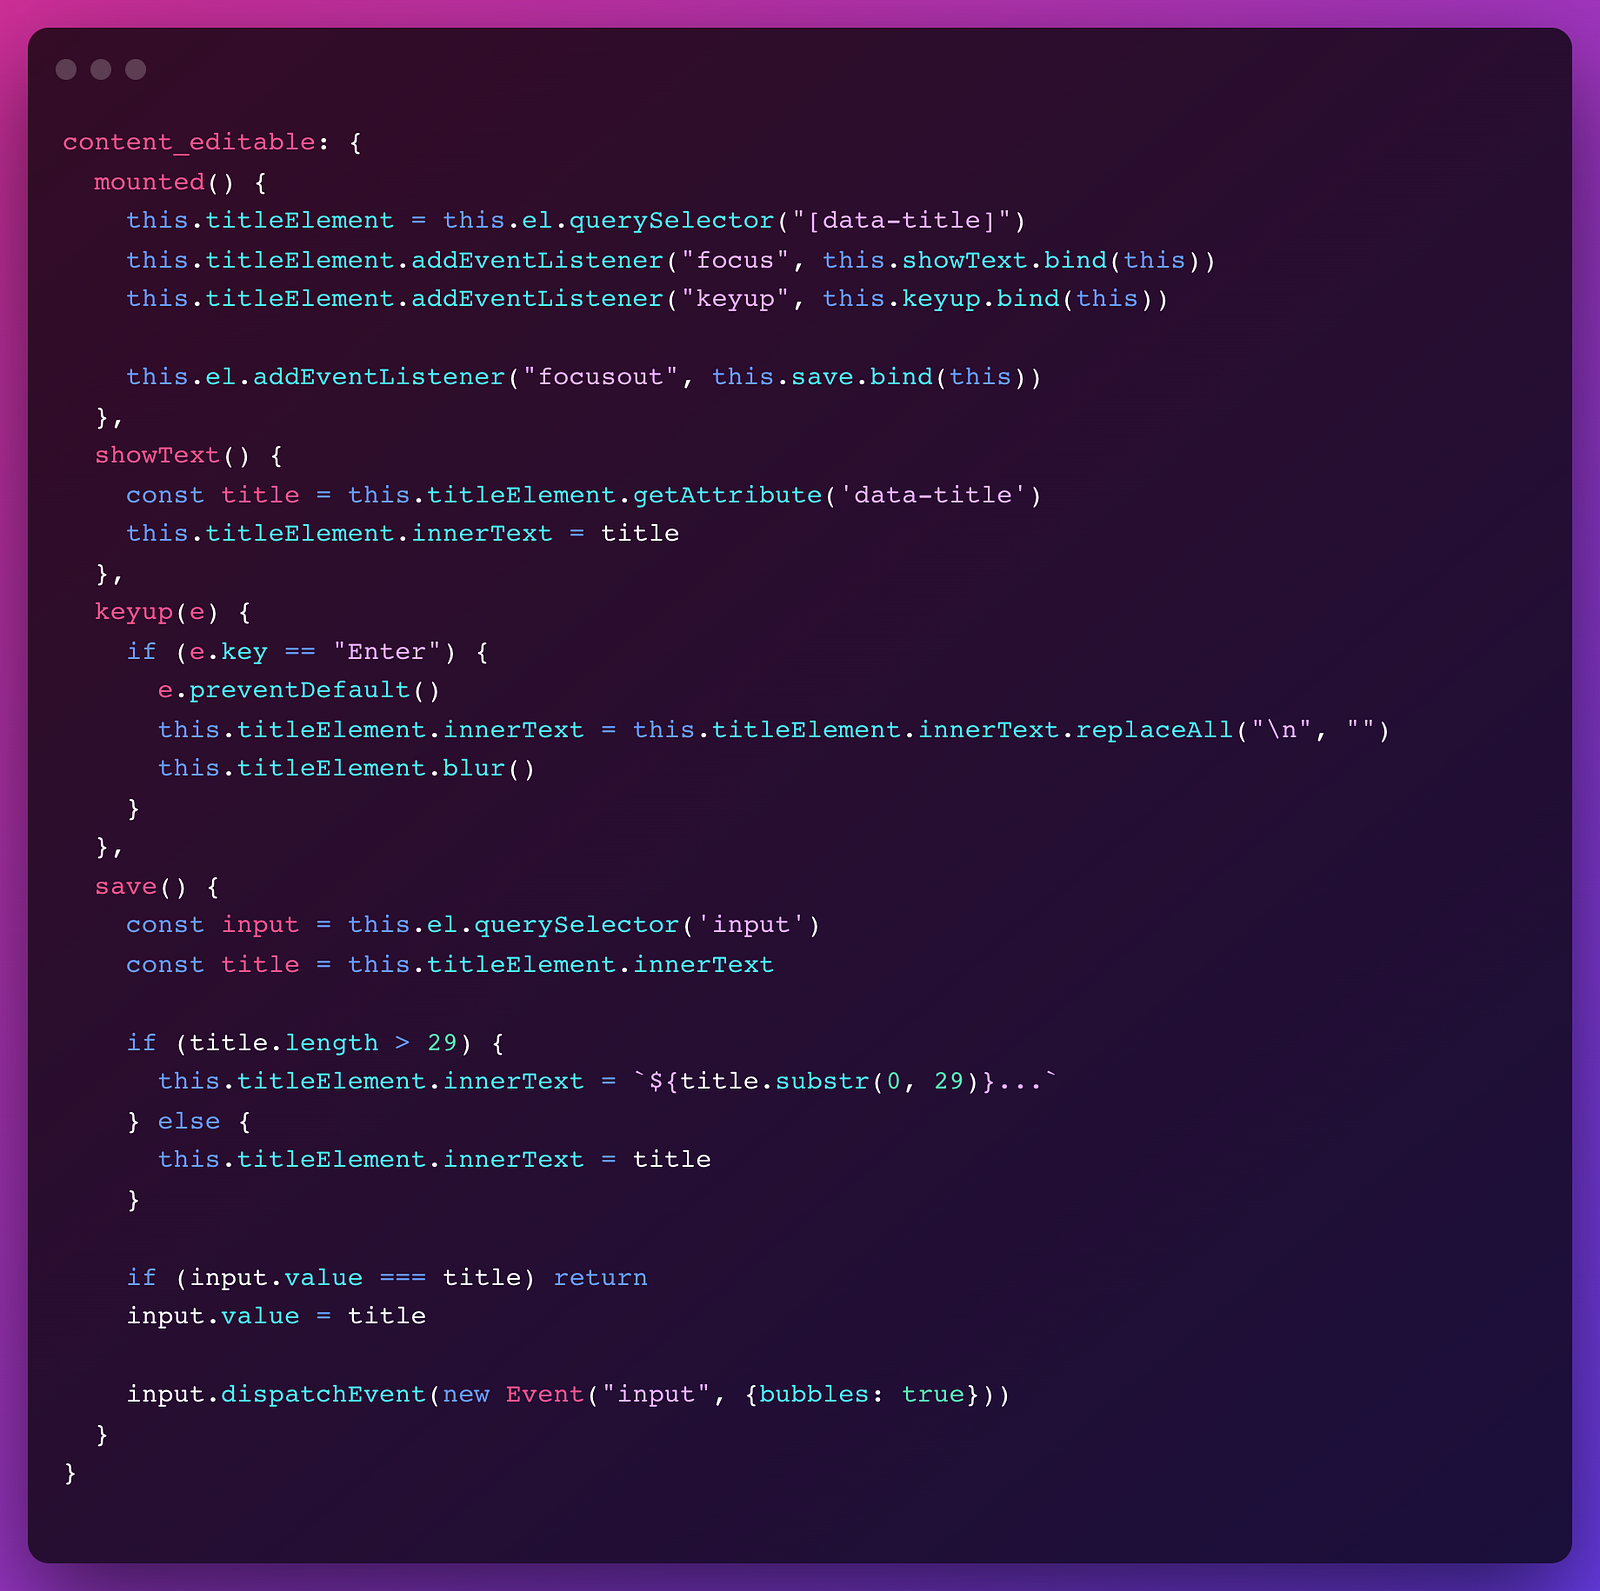
It’s a lot, but let me walk you through it. The mounted() function is where it all begins and sets up those events. The idea is when you focus on the element, by clicking on it, we’ll show the complete title text given by Phoenix through the data-title attribute. This means when it’s truncated, it will show the complete text inside the element.
And whenever focusout occurs or you hit enter on your keyboard, it will call save(), which does what it says it does. The keyboard event is triggered by keyup and calls showText(), which also removes the unneeded newlines (because of the enter key). focusout happens whenever you click outside the element once it had focus, or when we call blur() on the element which we do when you hit that enter.
Lastly, when we save we truncate the text again and change the value of the form element when it’s actually different. To make sure the form is handled by Phoenix, we need to dispatch an event on the input element.
That’s it. We have a contenteditable component in Phoenix:

You can check the final code on Github.
